Table of Contents
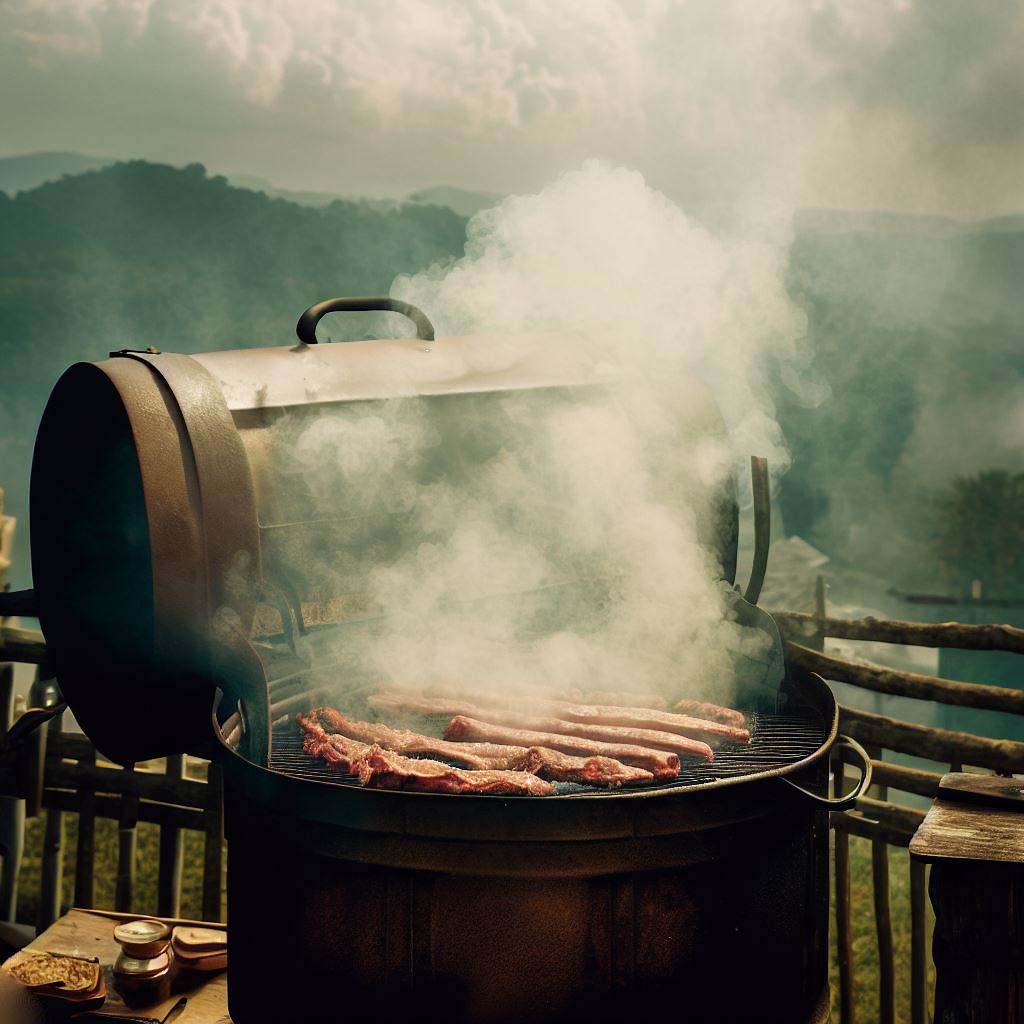
If you are a fan of barbecue, you might have heard of or seen an Old Country BBQ Pit. An Old Country BBQ Pit is a type of barbecue equipment that is made from steel plate, pipes, hinges, and bolts. It is designed to hold the cooking temperature, reduce babysitting, and help you cook great barbecue. It is also more authentic and durable than a store-bought grill that you wheel out every now and then.
In this article, we will tell you everything you need to know about Old Country BBQ Pits. We will explain what they are, where they come from, how they work, and how you can get one. We will also show you how to choose, use, and even build your own Old Country BBQ Pit. By the end of this article, you will be ready to enjoy your own homemade barbecue with your family and friends.
Table of Contents
Types of Old Country BBQ Pits
Old Country BBQ Pits come in different types, shapes, and sizes. Depending on your needs and preferences, you can choose from portable smokers, backyard pits, grills, and fire pits. Here are some of the main features, benefits, and drawbacks of each type:
- Portable smokers: These are small and lightweight smokers that you can take with you anywhere. They are ideal for camping trips, tailgating parties, or picnics. They can cook a variety of food items using charcoal or wood chips. They are easy to set up and operate. However, they have limited cooking space and may not be suitable for large cuts of meat or big groups of people.
- Backyard pits: These are large and heavy-duty pits that you can install in your backyard or patio. They can cook large amounts of food using charcoal or wood chips. They can also double up as smokers by adding a firebox or a chimney. They are perfect for hosting barbecue parties or family gatherings. However, they require more space and maintenance. They may also be subject to local regulations or restrictions.
- Grills: These are simple and versatile grills that you can use for direct or indirect grilling. They can cook a variety of food items using charcoal or gas. They are easy to use and clean. However, they may not produce the same smoky flavor as smokers or pits. They may also be prone to flare-ups or hot spots.
- Fire pits: These are decorative and functional fire pits that you can use for warmth, ambiance, or cooking. They can burn wood, charcoal, or gas. They can also be used to roast marshmallows, hot dogs, or skewers. They are great for creating a cozy and festive atmosphere. However, they may not be very efficient or consistent for cooking. They may also pose a fire hazard or a smoke nuisance.
Some examples and photos of each type of Old Country BBQ Pit are:
- Portable smoker: Old Country BBQ Pits All American Brazos Smoker – Shipped and Crated
- Backyard pit: Old Country BBQ Pits All American Brazos Smoker DLX Heavy Duty Loaded – Crated and Shipped
- Grill: Old Country BBQ Pits Wrangler Smoker
- Fire pit: Old Country BBQ Pits Cowboy Fire Pit
How to Choose an Old Country BBQ Pit
If you are interested in getting an Old Country BBQ Pit, you might be wondering how to choose the best one for you. There are some tips and factors to consider when making your decision, such as:
- Size: You should consider how much food you want to cook and how many people you want to serve. You should also consider how much space you have in your backyard or patio. You should choose an Old Country BBQ Pit that fits your cooking and space needs.
- Design: You should consider how you want your Old Country BBQ Pit to look and function. You should also consider your personal style and preference. You should choose an Old Country BBQ Pit that matches your taste and personality.
- Budget: You should consider how much money you want to spend on your Old Country BBQ Pit. You should also consider the quality and durability of the materials and craftsmanship. You should choose an Old Country BBQ Pit that suits your budget and expectations.
Some models and brands of Old Country BBQ Pits that suit different needs and preferences are:
- For portability and convenience: Old Country BBQ Pits All American Brazos Smoker – Shipped and Crated
- For durability and functionality: Old Country BBQ Pits All American Brazos Smoker DLX Heavy Duty Loaded – Crated and Shipped
- For simplicity and versatility: Old Country BBQ Pits Wrangler Smoker
- For decoration and entertainment: Old Country BBQ Pits Cowboy Fire Pit
Some links or resources for finding and buying Old Country BBQ Pits online or in person are:
- http://bbquepits.com/
- https://texasstargrillshop.com/collections/old-country-bbq-smokers
- https://www.academy.com/p/old-country-bbq-pits-all-american-brazos-smoker
How to Use an Old Country BBQ Pit
Once you have chosen and bought your Old Country BBQ Pit, you might be eager to start using it. However, before you do, you should learn how to set up, operate, and maintain your Old Country BBQ Pit safely and efficiently. Here are some instructions and guidelines for using different types of Old Country BBQ Pits for different kinds of food:
Portable smoker: To use a portable smoker, you should follow these steps:
- Find a level and stable surface to place your portable smoker. Make sure it is away from any flammable or combustible materials.
- Fill the charcoal grate with charcoal or wood chips. Light them with a match or a lighter. Wait until they turn white or gray.
- Place the food grate on top of the charcoal grate. Arrange your food items on the food grate. Close the lid.
- Adjust the vents on the lid and the body to control the temperature and smoke level. You can use a thermometer to monitor the temperature inside the smoker.
- Check on your food periodically and flip or move it as needed. Use a meat thermometer to check the doneness of your food.
- When your food is ready, remove it from the smoker and let it rest for 10 minutes before serving or cutting it.
- After using the smoker, let it cool down completely before cleaning it. Remove any ash, charcoal, or food residue from the grates using a brush or a scraper. Wash the grates with warm water and mild soap. Rinse and dry them thoroughly.
- Wipe the inside and outside of the smoker with a damp cloth. Do not use harsh chemicals or abrasives that can damage the paint or the metal.
- Store your smoker in a dry and shaded place when not in use. Cover it with a tarp or a cover if possible.
Backyard pit: To use a backyard pit, you should follow these steps:
- Find a suitable location for your backyard pit. Make sure it is away from any flammable or combustible materials. You may also need to check with your local authorities or neighbors for any regulations or restrictions.
- Fill the firebox or the chimney with charcoal or wood chips. Light them with a match or a lighter. Wait until they turn white or gray.
- Place the food grate on top of the body. Arrange your food items on the food grate. Close the lid.
- Adjust the vents on the firebox, the chimney, and the lid to control the temperature and smoke level. You can use a thermometer to monitor the temperature inside the pit.
- Check on your food periodically and flip or move it as needed. Use a meat thermometer to check the doneness of your food.
- When your food is ready, remove it from the pit and let it rest for 10 minutes before serving or cutting it.
- After using the pit, let it cool down completely before cleaning it. Remove any ash, charcoal, or food residue from the grates using a brush or a scraper. Wash the grates with warm water and mild soap. Rinse and dry them thoroughly.
- Wipe the inside and outside of the pit with a damp cloth. Do not use harsh chemicals or abrasives that can damage the paint or the metal.
- Cover your pit with a tarp or a cover when not in use. Store it in a dry and shaded place.
- Grill: To use a grill, you should follow these steps:
- Find a level and stable surface to place your grill. Make sure it is away from any flammable or combustible materials.
- Fill the charcoal grate with charcoal or gas. Light them with a match or a lighter. Wait until they turn white or gray.
- Place the food grate on top of the charcoal grate. Arrange your food items on the food grate. Close the lid.
- Adjust the vents on the lid and the body to control the temperature and smoke level. You can use a thermometer to monitor the temperature inside the grill.
- Check on your food periodically and flip or move it as needed. Use a meat thermometer to check the doneness of your food.
- When your food is ready, remove it from the grill and let it rest for 10 minutes before serving or cutting it.
- After using the grill, let it cool down completely before cleaning it. Remove any ash, charcoal, or food residue from the grates using a brush or a scraper. Wash the grates with warm water and mild soap. Rinse and dry them thoroughly.
- Wipe the inside and outside of the grill with a damp cloth. Do not use harsh chemicals or abrasives that can damage the paint or the metal.
- Store your grill in a dry and shaded place when not in use. Cover it with a tarp or a cover if possible.
Fire pit: To use a fire pit, you should follow these steps:
- Find a suitable location for your fire pit. Make sure it is away from any flammable or combustible materials. You may also need to check with your local authorities or neighbors for any regulations or restrictions.
- Fill the fire pit with wood, charcoal, or gas. Light them with a match or a lighter. Wait until they burn steadily and brightly.
- Place some skewers, marshmallows, hot dogs, or other food items around or over the fire pit. Be careful not to touch or drop them into the fire pit.
- Enjoy your food and your fire pit while keeping an eye on them. Do not leave them unattended or let children or pets near them.
- After using the fire pit, let it burn out completely before cleaning it. Remove any ash, charcoal, or food residue from the fire pit using a shovel or a rake. Dispose of them safely and properly.
- Wipe the inside and outside of the fire pit with a damp cloth. Do not use harsh chemicals or abrasives that can damage the paint or the metal.
- Cover your fire pit with a tarp or a cover when not in use. Store it in a dry and shaded place.
How to Build Your Own Old Country BBQ Pit
If you are feeling adventurous and creative, you might want to build your own Old Country BBQ Pit from scratch. This way, you can customize and personalize your Old Country BBQ Pit according to your own specifications and preferences. You will need some tools and materials, some time and labor, and some skills and knowledge to do this.
To build your own Old Country BBQ Pit, you should follow these steps:
- Plan and design your Old Country BBQ Pit. Decide on the type, size, shape, and style of your Old Country BBQ Pit. Draw a sketch or a blueprint of your Old Country BBQ Pit. Make a list of the tools and materials you will need and where to get them.
- Prepare the tools and materials. Gather up the tools and materials you will need for the project, such as steel plate, pipes, hinges, bolts, drill, saw, grinder, metal brake, wrench, silicone, expanded metal, paint, etc. You can find most of these tools and materials at your local hardware store or online. You can also look for scrap yards or metal shops that sell steel plate and pipe at a lower price. Just make sure they are in good condition and free of rust or dirt.
- Prepare the site. Find a level and stable surface to work on your Old Country BBQ Pit. Make sure it is away from any flammable or combustible materials. You may also need to check with your local authorities or neighbors for any regulations or restrictions.
- Cut the steel plate. Measure and mark the steel plate according to the desired dimensions of your Old Country BBQ Pit. You will need four pieces of steel plate: one for the bottom, two for the sides, and one for the back. The front will be left open for access. Use a saw or a plasma cutter to cut along the marked lines. Use a grinder or a file to smooth the edges of the cut steel plate.
- Bend the steel plate. Use a metal brake or a vise to bend the steel plate into a rectangular shape that will form the body of your Old Country BBQ Pit. Make sure that the corners are square and aligned. Drill holes along the edges of each piece of steel plate for bolting.
- Assemble the body. Use bolts and nuts to connect the four pieces of steel plate together to form a box-like structure that will be the body of your Old Country BBQ Pit. Tighten and secure them with a wrench or a socket. Check for any gaps or leaks in the joints and seal them with silicone or caulk if needed.
- Attach the legs. Measure and mark four equal lengths of steel pipe that will serve as the legs of your Old Country BBQ Pit. You can choose how long you want them to be, but a good length is about 3 feet. Use a saw or a pipe cutter to cut the steel pipe according to the marked lengths. Drill holes on both ends of each pipe for bolting. Attach one end of each pipe to each corner of the bottom side of the body using bolts and nuts. Attach four metal caps or feet to the other end of each pipe using bolts and nuts.
- Make the lid. Measure and mark another piece of steel plate that will serve as the lid of your Old Country BBQ Pit. It should be slightly larger than the opening of the body, but not too large that it will overhang or interfere with the legs. Cut, bend, drill, and smooth the steel plate following similar steps as in Step 4 and Step 5. Attach two hinges to one side of the lid using bolts and nuts. Attach a handle or a knob to the opposite side of the lid using bolts and nuts.
- Attach the lid. Align and position the lid on top of the body so that the hinges match with one side of the body. Use bolts and nuts to secure the hinges to the body. Test if the lid opens and closes smoothly and adjust if needed.
- Add cooking grates. Measure and mark two pieces of expanded metal that will serve as cooking grates for your Old Country BBQ Pit. They should be slightly smaller than the inside dimensions of the body, but not too small that they will fall through. Cut and smooth the expanded metal following similar steps as in Step 4. Place one piece of expanded metal inside the body at about one-third from the bottom as a charcoal grate. This will hold the charcoal and provide heat for your Old Country BBQ Pit. Place another piece of expanded metal inside the body at about two-thirds from the bottom as a food grate. This will hold the food and allow it to cook with the heat and smoke from your Old Country BBQ Pit.
- Paint and season your Old Country BBQ Pit. Clean and dry your Old Country BBQ Pit before painting it with high-temperature paint or spray paint. Choose a color and design that suits your preference and style. Apply multiple coats of paint and let it dry completely. Season your Old Country BBQ Pit by burning some charcoal and wood chips inside it for a few hours. This will create a protective layer and remove any unwanted odors or residues from your Old Country BBQ Pit.
DIY: Old Country BBQ Pit
In this section, we will show you how to build your own Old Country BBQ Pit from scratch. You will need some tools and materials, some time and labor, and some creativity and pride. But don’t worry, it’s not as hard as it sounds. By following these simple steps, you can have your own Old Country BBQ Pit ready in no time.
Tools and Materials Needed
Before you start, you will need to gather up the following tools and materials for the project:
- Steel plate (1/4 inch thick, 4 feet by 8 feet)
- Steel pipe (2 inch diameter, 10 feet long)
- Hinges (2)
- Bolts and nuts (various sizes)
- Drill
- Saw or plasma cutter
- Grinder or file
- Metal brake or vise
- Wrench or socket
- Silicone or caulk
- Expanded metal (36 inch by 36 inch)
- High-temperature paint or spray paint
- Charcoal and wood chips
You can find most of these tools and materials at your local hardware store or online. You can also look for scrap yards or metal shops that sell steel plate and pipe at a lower price. Just make sure they are in good condition and free of rust or dirt.
When handling the tools and materials, be sure to wear gloves, goggles, and other protective gear. Steel plate and pipe can be sharp, heavy, and hot. You don’t want to hurt yourself or damage anything.
Step 1: Cut the Steel Plate
The first step is to cut the steel plate according to the desired dimensions of your Old Country BBQ Pit. You will need four pieces of steel plate: one for the bottom, two for the sides, and one for the back. The front will be left open for access.
To cut the steel plate, you will need a saw or a plasma cutter. A saw is cheaper and easier to use, but a plasma cutter is faster and more precise. Either way, you will need to measure and mark the steel plate before cutting it.
Here are the suggested dimensions for each piece of steel plate:
- Bottom: 36 inch by 24 inch
- Sides: 36 inch by 18 inch
- Back: 24 inch by 18 inch
You can adjust these dimensions according to your preference and space. Just make sure they are proportional and fit together.
To cut the steel plate, follow these steps:
- Measure and mark the steel plate according to the dimensions using a tape measure and a marker.
- Use a saw or a plasma cutter to cut along the marked lines.
- Use a grinder or a file to smooth the edges of the cut steel plate.
Step 2: Bend the Steel Plate
The next step is to bend the steel plate into a rectangular shape that will form the body of your Old Country BBQ Pit. You will need a metal brake or a vise to do this. A metal brake is a machine that can bend metal into different angles. A vise is a tool that can hold metal firmly while you bend it manually.
To bend the steel plate, follow these steps:
- Place one piece of steel plate on the metal brake or vise.
- Adjust the angle of the metal brake or vise according to how much you want to bend the steel plate.
- Apply pressure on the metal brake or vise until the steel plate bends to the desired angle.
- Repeat this process for each piece of steel plate until you have four rectangular pieces that can fit together as a box.
Make sure that the corners are square and aligned. You can use a spirit level or a carpenter’s square to check this.
Step 3: Assemble the Body
The third step is to assemble the body of your Old Country BBQ Pit by connecting the four pieces of steel plate together. You will need bolts and nuts to do this. Bolts and nuts are fasteners that can join metal parts together securely. You will also need a drill to make holes for the bolts and nuts.
To assemble the body, follow these steps:
- Drill holes along the edges of each piece of steel plate using a drill and a bit that matches the size of your bolts and nuts. You can use a ruler and a marker to mark where you want to drill the holes. Make sure they are evenly spaced and aligned with each other.
- Place one piece of steel plate on the ground as the bottom of your Old Country BBQ Pit. Place another piece of steel plate on top of it as one side of your Old Country BBQ Pit. Align the holes and insert bolts and nuts through them. Tighten and secure them with a wrench or a socket.
- Repeat this process for the other two pieces of steel plate until you have a box-like structure that is the body of your Old Country BBQ Pit.
- Check for any gaps or leaks in the joints and seal them with silicone or caulk if needed.
Step 4: Attach the Legs
The fourth step is to attach the legs to your Old Country BBQ Pit. You will need four pieces of steel pipe, four metal caps or feet, and more bolts and nuts to do this. Steel pipe is a hollow tube that can support weight and provide stability. Metal caps or feet are attachments that can protect the ends of the pipe and prevent them from sinking into the ground.
To attach the legs, follow these steps:
- Measure and mark four equal lengths of steel pipe that will serve as the legs of your Old Country BBQ Pit. You can choose how long you want them to be, but a good length is about 3 feet.
- Use a saw or a pipe cutter to cut the steel pipe according to the marked lengths.
- Drill holes on both ends of each pipe for bolting using a drill and a bit that matches the size of your bolts and nuts.
- Attach one end of each pipe to each corner of the bottom side of the body using bolts and nuts. Make sure they are perpendicular to the body and evenly spaced.
- Attach four metal caps or feet to the other end of each pipe using bolts and nuts. Make sure they are level and stable.
Step 5: Make the Lid
The fifth step is to make the lid for your Old Country BBQ Pit. You will need another piece of steel plate, two hinges, a handle or a knob, and more bolts and nuts to do this. A lid is a cover that can prevent heat loss, control airflow, and protect your food from dust or insects. Hinges are devices that can allow the lid to open and close. A handle or a knob is an attachment that can help you lift and lower the lid.
To make the lid, follow these steps:
- Measure and mark another piece of steel plate that will serve as the lid of your Old Country BBQ Pit. It should be slightly larger than the opening of the body, but not too large that it will overhang or interfere with the legs.
- Cut, bend, drill, and smooth the steel plate following the same steps as in Step 1 and Step 2.
- Attach two hinges to one side of the lid using bolts and nuts. Make sure they are aligned with each other and spaced evenly from the edges.
- Attach a handle or a knob to the opposite side of the lid using bolts and nuts. Make sure it is centered and comfortable to grip.
Step 6: Attach the Lid
The sixth step is to attach the lid to your Old Country BBQ Pit. You will need more bolts and nuts to do this. Attaching the lid will allow you to control the temperature and smoke level of your Old Country BBQ Pit.
To attach the lid, follow these steps:
- Align and position the lid on top of the body so that the hinges match with one side of the body.
- Use bolts and nuts to secure the hinges to the body. Make sure they are tight and sturdy.
- Test if the lid opens and closes smoothly and adjust if needed.
Step 7: Add Cooking Grates
The seventh step is to add cooking grates to your Old Country BBQ Pit. You will need two pieces of expanded metal to do this. Expanded metal is a type of metal mesh that can hold charcoal and food. It is also easy to clean and durable.
To add cooking grates, follow these steps:
- Measure and mark two pieces of expanded metal that will serve as cooking grates for your Old Country BBQ Pit. They should be slightly smaller than the inside dimensions of the body, but not too small that they will fall through.
- Cut and smooth the expanded metal following similar steps as in Step 1.
- Place one piece of expanded metal inside the body at about one-third from the bottom as a charcoal grate. This will hold the charcoal and provide heat for your Old Country BBQ Pit.
- Place another piece of expanded metal inside the body at about two-thirds from the bottom as a food grate. This will hold the food and allow it to cook with the heat and smoke from your Old Country BBQ Pit.
Step 8: Paint and Season Your Old Country BBQ Pit
The eighth and final step is to paint and season your Old Country BBQ Pit. You will need high-temperature paint or spray paint, charcoal and wood chips to do this. Painting your Old Country BBQ Pit will give it a nice finish and protect it from rust and corrosion. Seasoning your Old Country BBQ Pit will create a protective layer and remove any unwanted odors or residues.
To paint and season your Old Country BBQ Pit, follow these steps:
- Clean and dry your Old Country BBQ Pit before painting it with high-temperature paint or spray paint. You can use a cloth, a brush, or a hose to remove any dirt or dust from your Old Country BBQ Pit.
- Choose a color and design that suits your preference and style. You can go for a classic black, a bright red, or a custom pattern. You can also add some stickers or decals to personalize your Old Country BBQ Pit.
- Apply multiple coats of paint and let it dry completely. Follow the instructions on the paint or spray paint can for best results.
- Season your Old Country BBQ Pit by burning some charcoal and wood chips inside it for a few hours. This will create a protective layer and remove any unwanted odors or residues from your Old Country BBQ Pit. You can also add some herbs or spices to enhance the flavor of your food.
Conclusion
Congratulations! You have just built your own Old Country BBQ Pit from scratch. You have learned how to cut, bend, drill, bolt, and paint steel plate and pipe to create a sturdy and functional BBQ pit. You have also learned how to add cooking grates, a lid, and legs to your Old Country BBQ Pit. You have also learned how to season your Old Country BBQ Pit to prepare it for cooking.
Now you can enjoy your homemade BBQ with your family and friends. You can try different recipes, techniques, and tips to make delicious food with your Old Country BBQ Pit. You can also show off your skills and creativity with your custom-made BBQ pit.
We hope you found this article helpful and informative. If you want to learn more about building your own Old Country BBQ Pit or other types of BBQ pits, you can check out these resources:
- https://www.wikihow.com/Build-a-BBQ-Pit
- https://www.thisoldhouse.com/yards/21018078/all-about-built-in-barbecue-pits
Thank you for reading and happy grilling!
FAQs
How much does it cost to build an Old Country BBQ Pit?
The cost of building an Old Country BBQ Pit depends on the size, design, and quality of the materials you use. However, you can expect to spend around $200-$300 for a basic Old Country BBQ Pit.
How long does it take to build an Old Country BBQ Pit?
The time it takes to build an Old Country BBQ Pit depends on your skill level, experience, and availability. However, you can expect to spend around 8-10 hours for a basic Old Country BBQ Pit.
How do I clean and maintain my Old Country BBQ Pit?
To clean and maintain your Old Country BBQ Pit, you should follow these steps:
After each use, let your Old Country BBQ Pit cool down completely before cleaning it.
Remove any ash, charcoal, or food residue from the charcoal and food grates using a brush or a scraper.
Wash the grates with warm water and mild soap. Rinse and dry them thoroughly.
Wipe the inside and outside of the body and lid with a damp cloth. Do not use harsh chemicals or abrasives that can damage the paint or the metal.
Cover your Old Country BBQ Pit with a tarp or a cover when not in use. Store it in a dry and shaded place.
How do I control the temperature and smoke level of my Old Country BBQ Pit?
To control the temperature and smoke level of your Old Country BBQ Pit, you should follow these steps:
Adjust the amount and type of charcoal and wood chips you use. More charcoal and wood chips will produce more heat and smoke. Less charcoal and wood chips will produce less heat and smoke.
Adjust the position of the lid. Opening the lid will allow more air to enter and increase the temperature and smoke level. Closing the lid will reduce the air flow and decrease the temperature and smoke level.
Adjust the vents on the body and lid. Opening the vents will allow more air to enter and increase the temperature and smoke level. Closing the vents will reduce the air flow and decrease the temperature and smoke level.
What are some tips for cooking with my Old Country BBQ Pit?
Here are some tips for cooking with your Old Country BBQ Pit:
Preheat your Old Country BBQ Pit for at least 15 minutes before adding your food.
Use a meat thermometer to check the doneness of your food. Different types of meat have different recommended internal temperatures for safety and quality.
Use a spray bottle to spray some water, vinegar, or juice on your food to keep it moist and tender.
Use a pair of tongs or a spatula to flip or move your food. Do not use a fork or a knife that can pierce or cut your food and cause it to lose juices.
Let your food rest for 10 minutes before serving or cutting it. This will allow the juices to redistribute and make your food more flavorful.
